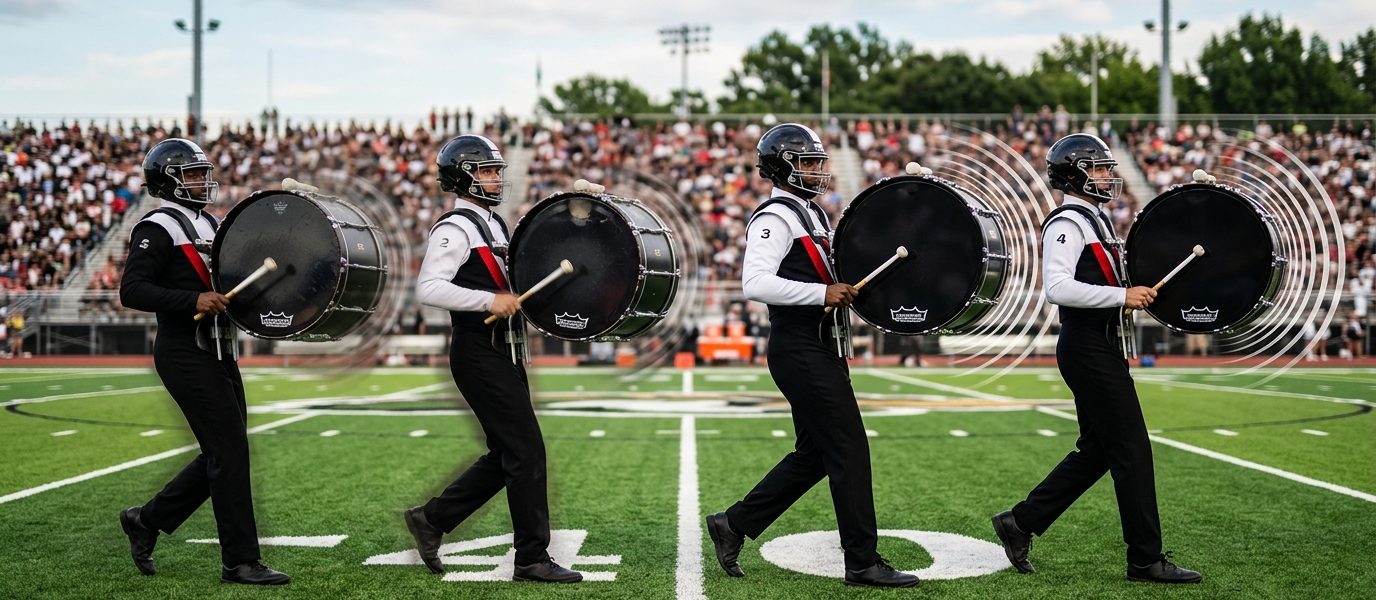
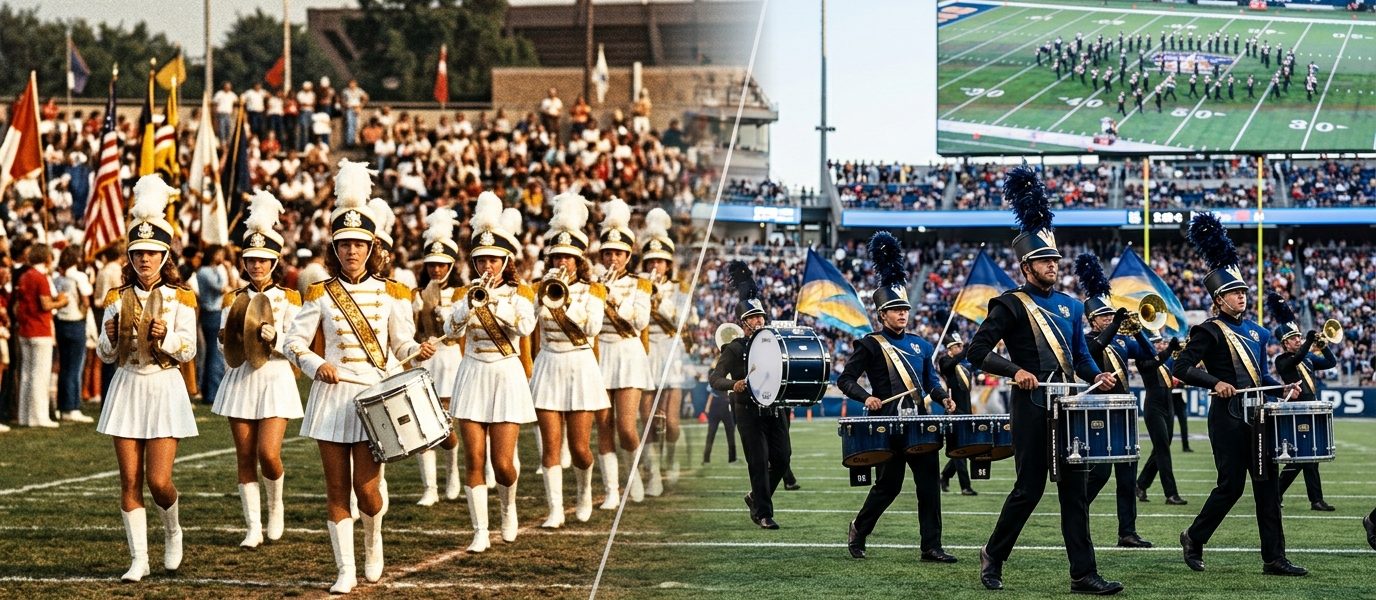
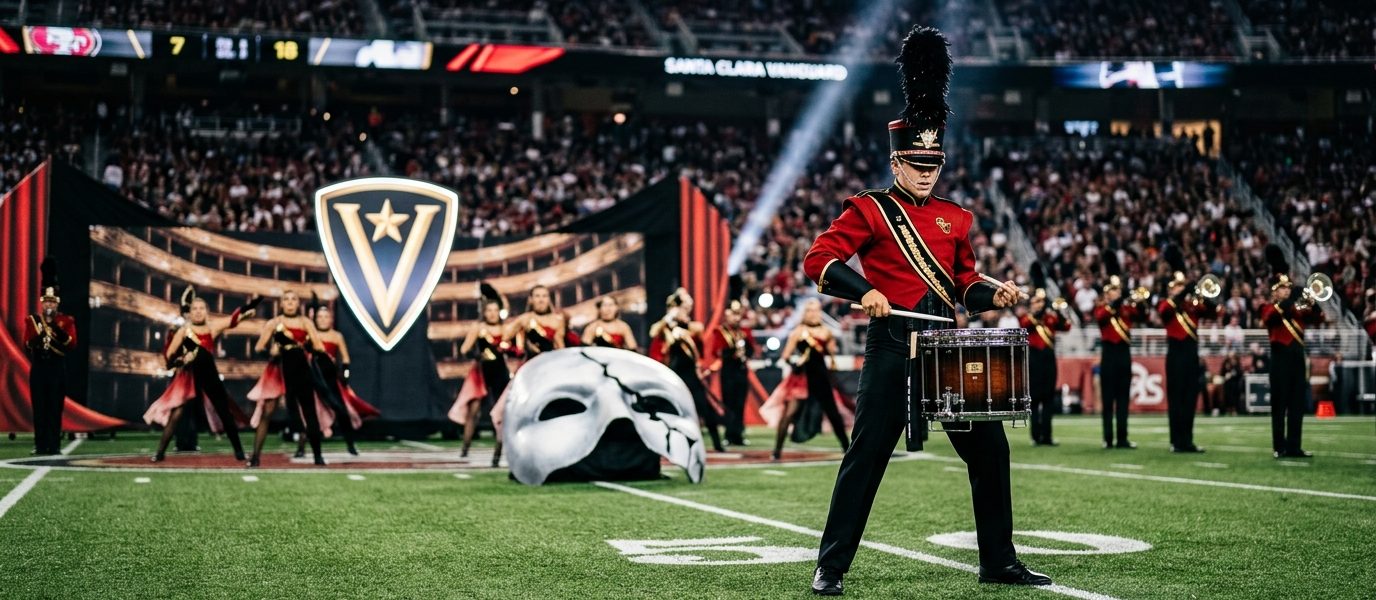
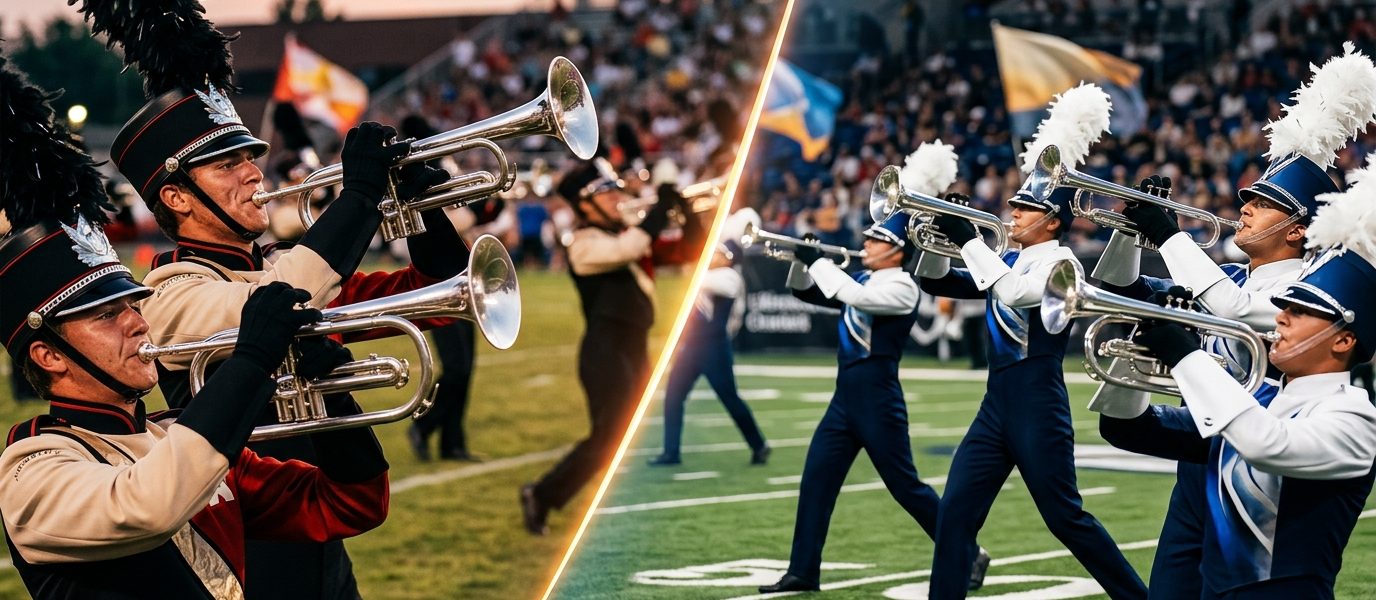
Blog

  • Best Drumsticks for Marching Snare: A Complete Buyer’s Guide

    You’ve spent hours perfecting your rolls and mastering your rudiments, but if your sticks aren’t up to the task, all that practice won’t translate to a clean performance on the field. The right pair of marching snare sticks can mean the difference between a crisp, articulate sound that cuts through the brass section and a weak, muddy tone that gets lost in the mix.

    Key Takeaway

    Marching snare sticks require specific features that standard drumsticks lack: heavier weight for projection, durable wood construction to withstand outdoor conditions, and specialized tip shapes for consistent articulation. The best models balance power with control, typically measuring 16.5 to 17 inches with diameters around 0.700 inches. Top choices include Vic Firth Corpsmaster, Innovative Percussion IP-1, and Promark System Blue DC17, each offering distinct tonal characteristics suited to different playing styles and ensemble needs.

    Why marching sticks are built differently

    Marching snare drumsticks face demands that indoor kit sticks never encounter. You’re playing outdoors where sound dissipates rapidly. You’re performing in rain, heat, and cold. You need projection that reaches the press box without sacrificing control during delicate passages.

    Standard drumsticks designed for drum kits prioritize finesse and rebound on coated heads. Marching sticks prioritize durability and volume on Kevlar or tight Mylar heads. The wood must be dense enough to survive thousands of repetitions on these unforgiving surfaces without splintering.

    Weight distribution matters more in marching applications. A front-heavy stick generates more power with less effort, which becomes critical during a ten-minute show. But too much weight in the tip creates fatigue and reduces speed. The best drumsticks for marching snare strike this balance through careful length and diameter specifications.

    Marching sticks typically measure between 16.5 and 17 inches, compared to 15 to 16 inches for most jazz or rock sticks. That extra length provides leverage for projection. Diameters hover around 0.700 inches, thicker than a standard 5A but not as bulky as a 2B. This sizing gives you enough mass for volume while maintaining the agility needed for fast passages.

    Top models compared

    The market offers dozens of marching stick options, but a few models dominate the field for good reason. Each brings specific characteristics that suit different playing styles and ensemble preferences.

    Model Length Diameter Weight Best For
    Vic Firth Corpsmaster MS3 17″ 0.700″ Medium-Heavy All-around performance, beginners
    Innovative Percussion IP-1 17″ 0.710″ Heavy Maximum projection, outdoor stadiums
    Promark System Blue DC17 17″ 0.695″ Medium Speed and articulation, indoor shows
    Vic Firth Corpsmaster MS5 16.5″ 0.710″ Medium Smaller hands, technical passages
    Innovative Percussion FS-CC 17″ 0.700″ Medium-Heavy Carolina Crown signature, balanced tone

    Vic Firth Corpsmaster sticks have earned their reputation through decades of use at the highest levels of drum corps. The MS3 remains the most popular choice among high school programs because it handles every musical demand without specializing in any particular area. The hickory construction survives an entire season of rehearsals and performances, and the oval tip produces a full, round tone that blends well in large ensembles.

    Innovative Percussion entered the marching market more recently but quickly gained ground with professional corps. Their IP-1 model features a slightly heavier build that generates impressive volume without requiring extra effort. The front-loaded weight distribution helps during long passages of forte playing, though some players find the added mass tiring during exposed solo sections.

    Promark’s System Blue line emerged from collaboration with the System Blue drum line, and the DC17 reflects that design-by-performers approach. These sticks feel slightly lighter in the hand despite similar specifications to competitors, which translates to faster rebound and cleaner execution of complex rudiments. The trade-off comes in slightly reduced projection compared to heavier models.

    Wood selection and durability

    Hickory dominates marching stick construction for practical reasons. This hardwood offers the ideal combination of density, flexibility, and shock absorption. It can handle the repeated impact of Kevlar heads without transmitting excessive vibration to your hands.

    Some manufacturers offer maple alternatives, but these rarely survive a full marching season. Maple works beautifully for jazz and orchestral applications where lighter touch and faster response matter more than durability. On the field, maple sticks tend to develop stress fractures within weeks of regular use.

    Oak appears occasionally in specialty models designed for maximum volume. These sticks project incredibly well but sacrifice comfort and rebound. Most players find oak too rigid for extended playing sessions, and the added weight creates fatigue during long rehearsals.

    Grain orientation affects longevity more than most players realize. Quality manufacturers align the wood grain parallel to the stick’s length, which prevents splitting along the shaft. Cheaper sticks often show irregular grain patterns that create weak points. Hold a potential purchase up to the light and look for straight, consistent grain lines running from butt to tip.

    The best investment you can make is buying two or three pairs of quality sticks at the start of the season rather than constantly replacing cheap ones. Quality sticks maintain their weight and balance even after months of use, which means your technique stays consistent. Budget sticks change characteristics as they wear, forcing you to constantly adjust your playing.

    Tip shape and sound production

    The tip shape determines your fundamental tone color and articulation clarity. Marching sticks typically feature one of three tip designs: oval, barrel, or teardrop. Each produces distinct sonic characteristics.

    Oval tips create the fullest, roundest tone. They contact the head across a larger surface area, which generates more overtones and warmth. This shape works well for ensembles that prioritize blend and musical phrasing over raw articulation. The MS3 and many other popular models use this design.

    Barrel tips offer maximum articulation and clarity. The squared-off shape contacts the head at a defined point, producing a focused attack with minimal spread. Technical passages become easier to execute cleanly, but the tone can sound harsh if you’re not careful with your touch. Indoor shows often benefit from this added definition.

    Teardrop tips split the difference between oval and barrel designs. They provide good articulation while maintaining some tonal warmth. Many players find this shape most versatile across different musical styles within a single show.

    Tip coating rarely appears on marching sticks, unlike kit sticks where nylon tips are common. The plastic coating wouldn’t survive the abuse of Kevlar heads, and the tone quality suffers on tight marching heads anyway. Stick with natural wood tips.

    Sizing for your hands and style

    Getting the right size matters more than brand loyalty. A stick that works perfectly for your section leader might feel awkward in your hands.

    Hand size provides your starting point. If you can comfortably wrap your fingers around a stick with about a quarter-inch gap between your fingertips and palm, the diameter works for you. Too thin, and you’ll grip too tightly trying to control the stick. Too thick, and you’ll struggle to maintain a relaxed hold during long passages.

    Playing style influences your ideal specifications. Fast, technical players often prefer slightly lighter sticks that rebound quickly. Power players who focus on volume and projection benefit from heavier models that do more work with less effort.

    Your position in the section matters too. Center snare players typically need maximum projection to anchor the battery, which suggests heavier sticks. Tenor break players might prioritize speed and control over raw volume.

    Try before you buy whenever possible. Many music stores keep demo sticks available, and most band directors maintain a stick bag with various models for students to test. Spend fifteen minutes playing scales, rudiments, and show excerpts with each option. The right stick feels like a natural extension of your arm rather than a tool you’re fighting to control.

    Maintenance and replacement timing

    Even the best drumsticks for marching snare eventually wear out. Knowing when to retire a pair prevents performance issues and potential injury.

    Check for these warning signs:

    • Visible cracks or splits in the shaft
    • Significant tip wear that changes the contact area
    • Warping that affects balance and rebound
    • Loose feeling in your grip caused by compression of the wood fibers
    • Noticeable weight difference between your left and right stick

    Most players need fresh sticks every four to six weeks during active season, though this varies based on practice intensity and playing style. Heavy hitters might burn through pairs in two weeks, while lighter players might stretch a quality pair through an entire season.

    Rotating between two or three pairs extends overall stick life. Use your newest pair for performances and important rehearsals. Break in your backup pair during sectionals and individual practice. This approach ensures you always have performance-ready sticks available while preventing the panic of discovering a broken stick during a show.

    Store your sticks properly between uses. Keep them in a climate-controlled environment when possible. Extreme temperature swings cause wood to expand and contract, which accelerates wear and can create cracks. Never leave sticks in a hot car or exposed to direct sunlight for extended periods.

    Budget considerations and value

    Quality marching sticks cost between twelve and twenty dollars per pair. That might seem expensive compared to budget options at five or six dollars, but the investment pays off.

    Cheap sticks rarely last more than a week or two of serious practice. You’ll spend more money replacing them constantly than you would have spent buying quality sticks upfront. More importantly, inconsistent stick characteristics force you to constantly adjust your technique, which slows your progress and can create bad habits.

    Buy in bulk when possible. Many retailers offer discounts for purchases of six pairs or more. Splitting a bulk order with section mates reduces the per-pair cost while ensuring everyone has backup sticks available.

    Consider your program’s needs when budgeting. If your band provides sticks, work with your director to ensure adequate quality. If you’re responsible for your own equipment, factor stick costs into your seasonal budget from the start. Plan on spending fifty to seventy-five dollars per season for sticks if you practice regularly.

    Some programs establish stick funds or include equipment costs in overall band fees. This approach ensures every player has access to appropriate sticks regardless of individual financial situations. Talk to your band boosters if your program doesn’t currently provide this support.

    Breaking in new sticks

    Fresh sticks need a break-in period before they feel comfortable and sound their best. The wood fibers compress slightly during initial use, which affects balance and response.

    Follow this break-in process:

    1. Start with pad practice for the first few hours of use. This allows the wood to compress gradually without the shock of hitting a Kevlar head.
    2. Progress to the drum at moderate dynamics. Play scales and rudiments at mezzo-forte for another hour or two.
    3. Gradually increase to full performance dynamics over several practice sessions. This staged approach prevents premature cracking while allowing the sticks to settle into their final playing characteristics.

    The break-in period typically takes three to five hours of playing time. You’ll notice the sticks feel more responsive and produce a more consistent tone as they settle. Rushing this process by immediately playing at full volume on a tight head can cause premature failure.

    Some players prefer the feel of brand-new sticks, while others like them better after a week of use. Pay attention to how your sticks change over time. This awareness helps you anticipate when they’re reaching the end of their useful life.

    Finding your perfect match

    Choosing the best drumsticks for marching snare comes down to matching specifications to your physical characteristics and musical demands. Start with a proven all-around model like the Vic Firth MS3 or Innovative Percussion IP-1. These sticks work well for most players and provide a baseline for comparison.

    Experiment from there based on your specific needs. If you need more projection, try a heavier model. If speed and articulation matter most, test lighter options with barrel tips. Give each new model at least a week of regular use before making judgments. Initial impressions can be misleading as you adjust to different weight distributions and balance points.

    Your sticks directly affect your sound, your comfort, and your ability to execute the music your staff writes. Taking time to find the right pair pays dividends throughout the season. The confidence that comes from knowing your equipment will perform exactly as expected lets you focus entirely on making music rather than fighting your tools.

    Start your search today, and you’ll be ready when that first downbeat hits.

  • How to Fix Your Backward Marching Before Your Next Competition

    Backward marching separates confident performers from nervous ones. You can nail every forward step, but the moment the drill chart flips you around, suddenly your feet tangle, your posture collapses, and you drift three yards off your dot. If your next competition is coming up and you still feel shaky moving in reverse, you’re not alone. Most marchers struggle with this skill at first. The good news? Backward marching is a learnable technique, not a talent you either have or don’t.

    Key Takeaway

    Backward marching requires toe-first contact, engaged core muscles, and a forward-leaning posture to maintain balance and precision. Practice with wall drills, mirror checks, and metronome tempos to build muscle memory. Focus on small, controlled steps rather than long strides, and always keep your chin up to preserve spatial awareness and prevent drifting off your drill coordinates.

    Why backward marching feels so awkward

    Your body didn’t evolve to move in reverse. Forward motion uses muscles and reflexes you’ve trained since you learned to walk. Backward motion flips that script. Your brain can’t see where you’re going, your weight distribution changes, and your usual stride length doesn’t work anymore.

    Most marchers make the mistake of trying to walk backward the same way they walk forward. They land heel-first, lean back to “catch” themselves, and take huge steps to cover more ground. All of these instincts work against you. Backward marching demands its own technique, and once you understand the mechanics, the skill clicks into place much faster.

    The foundation of good backward technique

    Start with your posture. Stand tall with your shoulders stacked over your hips. Your chin should be level, not tilted down. Many marchers look at the ground when moving backward, which throws off their balance and makes it impossible to see the field or their section leader.

    Your core muscles need to stay engaged. Think about pulling your belly button toward your spine. This creates a stable center that keeps you from wobbling side to side. A loose core leads to sloppy steps and uneven spacing.

    Weight distribution matters more than you think. Shift your weight slightly forward onto the balls of your feet. This feels counterintuitive when moving backward, but it gives you control. Leaning back makes you heavy on your heels, which causes you to stumble or drag your feet.

    The step-by-step process for backward marching

    Here’s how to build the fundamental backward step from scratch.

    1. Stand in good marching posture with your weight on the balls of your feet.
    2. Lift one foot slightly off the ground, keeping your knee bent and your toe pointed down.
    3. Extend that leg backward, reaching with your toe first.
    4. Make contact with the ground using the ball of your foot, not your heel.
    5. Roll through the foot from ball to heel as you transfer your weight.
    6. Push off the opposite foot to bring it back and repeat the motion.

    This sequence should feel smooth and continuous. Your knees stay soft, never locked. Your hips stay level, not bouncing up and down. Each step connects to the next without pauses or jerky transitions.

    Common mistakes and how to fix them

    Mistake Why It Happens Fix
    Heel strikes first Trying to walk backward like walking forward Focus on toe-first contact every single step
    Leaning backward Fear of falling or losing balance Shift weight forward onto balls of feet
    Looking down at feet Lack of confidence in step placement Practice with chin level, eyes on horizon
    Taking huge steps Trying to cover more ground faster Use smaller, controlled steps for precision
    Bouncing or bobbing Unlocked knees and uneven weight transfer Keep knees soft and core engaged
    Drifting left or right Uneven push-off or weak core Film yourself or use a straight line reference

    The heel-strike problem is the most common. Your brain wants to land on your heel because that’s what it does going forward. Fight this instinct. Every backward step should contact the ground with the ball of your foot first. This gives you control and prevents the clunky, stomping sound that ruins the visual effect.

    Leaning backward feels safe, but it actually makes you less stable. Think about pushing your chest forward slightly. This keeps your center of gravity over your feet instead of behind them. You’ll feel more balanced and less likely to trip.

    Drills that actually work

    Wall drills build the muscle memory you need. Stand facing a wall with your toes about six inches away. Place your hands lightly on the wall at shoulder height. Now practice your backward steps. The wall prevents you from leaning back and forces you to keep your weight forward. Do this for five minutes every day until the posture feels natural.

    Line drills help with alignment. Find a straight line on the ground (a yard line, a crack in the pavement, or a piece of tape). Stand with your heels on the line. March backward, keeping both feet on the line with every step. If you drift off, you’re pushing unevenly or your core isn’t engaged. Film yourself from behind to see exactly where you’re going wrong.

    Metronome drills lock in your tempo. Set a metronome to your show tempo. March backward for 32 counts, focusing on hitting every beat precisely. Don’t worry about distance yet. Worry about consistency. Once you can stay on tempo for 32 counts without speeding up or slowing down, add another 32.

    “The secret to backward marching isn’t in your feet. It’s in your core and your eyes. If your core is loose or you’re staring at the ground, your feet can’t save you. Fix your posture and your sight line, and your feet will follow.” – Veteran drum corps instructor

    Building speed without losing control

    Speed comes from efficiency, not effort. When you try to force yourself to move faster, you tense up, your steps get choppy, and your spacing falls apart. Instead, focus on making each step as clean as possible at a comfortable tempo. Then gradually increase the metronome by two or three beats per minute every few days.

    Short steps are faster than long steps when moving backward. This sounds wrong, but it’s true. Long steps require more time to extend your leg, make contact, and transfer your weight. Short steps keep your feet closer to the ground and allow for faster turnover. You’ll cover the same distance with better control.

    Your arms need to stay active. Don’t let them go stiff or drop to your sides. Keep your normal arm swing going, just like you would marching forward. This helps with balance and keeps your upper body relaxed.

    Staying on your dots during backward sequences

    Spatial awareness is harder when you can’t see where you’re going. Before you start moving backward in rehearsal, turn around and look at your destination. Identify a landmark (a tree, a building, a yard line) that lines up with where you need to end up. As you march backward, keep that landmark in your peripheral vision.

    Count your steps. If your drill chart says you need to travel eight yards in 16 counts, that’s a specific step size. Practice that exact distance at that exact tempo until your body knows what 16 backward steps should feel like. When you nail it in rehearsal, your muscle memory will carry you through on the field.

    Use your section as a reference. If you’re drifting, you’ll notice the spacing between you and your neighbors changing. Check in visually every four or eight counts. If someone is getting closer or farther away, adjust on the next step.

    Practicing with your instrument

    Everything gets harder when you add your instrument. Your center of gravity shifts, your visual field narrows, and your arms are locked in playing position instead of helping with balance. Start by practicing backward marching with your instrument at attention position. Get comfortable with the weight distribution before you add playing.

    Once you can march backward smoothly with your instrument up, add simple exercises. Long tones work well because you don’t have to think about fingerings or rhythms. Focus on keeping your air steady and your steps even. If your sound gets shaky, you’re tensing up or bouncing.

    Sousaphone and bass drum players have extra challenges. Your instrument blocks your peripheral vision and changes your balance point significantly. Use the wall drill with your instrument on. This teaches your body how to compensate for the weight and bulk. Film yourself from the side to check for leaning or tilting.

    Fixing balance problems

    If you feel wobbly or unstable, your core is probably the culprit. Planks, side planks, and dead bugs are simple exercises that build the core strength you need for marching. Do three sets of 30-second planks every day. You’ll notice a difference in your stability within two weeks.

    Ankle strength matters too. Single-leg balance exercises help. Stand on one foot for 30 seconds, then switch. Once that’s easy, try it with your eyes closed. This builds the small stabilizer muscles in your ankles and improves your proprioception.

    If one side feels weaker than the other, you’ll drift in that direction. Identify which side is the problem and do extra reps on that leg. Balance work should be uneven if your body is uneven. The goal is symmetry, not identical training.

    What to do the week before your show

    Taper your physical practice. Don’t try to cram in hours of backward marching drills the day before a performance. Your body needs rest to perform well. Three days out, cut your practice time in half. The day before, do a light walk-through at half tempo just to remind your muscles of the pattern.

    Mental rehearsal works. Close your eyes and visualize yourself marching backward through your show. See yourself hitting every dot, staying in step, and moving with confidence. Picture the landmarks you’ll use for alignment. This mental practice reinforces the neural pathways you’ve built during physical rehearsal.

    Check your shoes. Worn-out soles or uneven tread can throw off your balance. If your shoes are old, consider replacing them before the competition. If that’s not an option, at least make sure they’re clean and the laces are secure.

    Confidence comes from repetition

    You won’t master backward marching by thinking about it. You’ll master it by doing it over and over until your body knows what to do without conscious thought. Ten minutes of focused practice every day beats one long session once a week. Your nervous system needs repetition to build the automatic responses that make marching look effortless.

    Film yourself regularly. What feels smooth in your body might look choppy on video. Recording your practice gives you objective feedback. Compare videos from week to week to see your progress. Celebrate the improvements, no matter how small.

    Ask for feedback from your section leader or instructor. They can see things you can’t feel. A slight drift, a timing issue, or a posture problem might be invisible to you but obvious to someone watching. Take their corrections seriously and apply them immediately in your next rep.

    Making backward marching second nature

    The marchers who look confident moving backward aren’t naturally gifted. They’ve just put in the reps. They’ve done the wall drills, fixed their posture, practiced with the metronome, and built the muscle memory that makes the technique automatic. You can do the same thing.

    Start today with five minutes of toe-first steps against a wall. Add line drills tomorrow. Build your core strength in the background. By the time your next competition arrives, backward marching won’t be the scary part of your show. It’ll be just another skill you own, one more way you contribute to a clean, powerful performance that leaves the judges impressed and your corps proud.

  • How to Eliminate Rim Clicks and Achieve Clean Snare Articulation

    Rim clicks happen to every drummer at some point. That sharp, metallic ping when your stick grazes the metal hoop instead of landing cleanly on the drumhead can ruin an otherwise perfect take. Whether you’re performing with a drum corps, recording in a studio, or just practicing at home, unwanted rim clicks break the flow and muddy your sound. The good news? You can fix this issue with the right combination of technique adjustments, equipment awareness, and recording strategies.

    Key Takeaway

    Eliminating rim clicks requires proper stick height control, centered striking zones, and consistent hand positioning. Drummers should focus on striking the drumhead’s center sweet spot while maintaining relaxed wrists. Audio engineers can reduce existing rim clicks through EQ filtering and careful mic placement. Combining technical refinement with smart recording practices creates clean, professional snare articulation across all playing contexts and musical styles.

    Understanding why rim clicks happen

    Rim clicks occur when your drumstick makes contact with the metal rim instead of, or in addition to, the drumhead. This creates a distinct high-frequency click that stands out from the intended snare tone.

    Several factors contribute to unwanted rim contact. Poor stick control ranks as the most common culprit. When your stroke lacks precision or your hands drift toward the drum’s edge, you increase the chance of hitting the rim.

    Stick height also plays a major role. Drummers who play with excessively high stick heights often struggle with accuracy. The longer distance between the stick and the head gives more room for error in the trajectory.

    Hand position matters too. If your hands naturally gravitate toward the outer edge of the drumhead rather than the center, you’re working in a danger zone where the rim is much closer to your strike point.

    Fatigue compounds all these issues. After an intense rehearsal or long recording session, your muscles tire and your precision drops. That’s when rim clicks tend to multiply.

    Technical adjustments for cleaner strikes

    Fixing rim clicks starts with refining your fundamental technique. These adjustments will help you develop more consistent, centered strikes.

    Center your strike zone

    The drumhead’s center provides the largest margin for error. Aim for a strike zone about two to three inches in diameter right in the middle of the head.

    Mark this zone with a small piece of tape during practice if needed. This visual reference helps train your muscle memory until centered striking becomes automatic.

    Marching snare drummers often develop exceptional center control because their technique demands it. The high-tension heads and exposed playing positions leave no room for sloppy stick placement.

    Control your stick height

    Lower stick heights improve accuracy dramatically. Instead of raising your sticks six or eight inches above the head, try working with three to four inches for most passages.

    This reduced distance gives you better control over where the stick lands. You’ll also find that lower heights don’t necessarily mean quieter playing. Proper technique and stick velocity matter more than raw height.

    Practice different dynamic levels at consistent stick heights. This teaches you to generate volume through speed and efficiency rather than exaggerated motion.

    Maintain proper hand position

    Your hands should hover over the drumhead’s center, not its edges. Check your setup by looking straight down at your drum. If your hands naturally rest over the outer third of the head, adjust your body position or drum angle.

    Some drummers benefit from tilting their snare drum slightly. A subtle angle can bring the center strike zone into a more natural hand path without forcing awkward wrist angles.

    Keep your wrists relaxed and flexible. Tension creates rigid, unpredictable strokes that increase rim contact. Loose wrists allow for fluid, controlled motion that naturally finds the center.

    Common mistakes that cause rim clicks

    Identifying what not to do helps as much as knowing correct techniques. This table breaks down frequent errors and their solutions.

    Mistake Why it causes rim clicks Solution
    Playing too close to the rim Reduces margin for error Move hands toward center of head
    Excessive stick heights Creates longer, less accurate stroke paths Lower stick heights to 3-4 inches
    Gripping sticks too tightly Restricts natural rebound and control Relax grip, allow sticks to breathe
    Angled stick approach Stick contacts rim before head Keep sticks perpendicular to drumhead
    Inconsistent stroke speed Creates unpredictable landing points Practice with metronome for evenness
    Fatigue playing Tired muscles lose precision Take breaks, build endurance gradually

    Recording strategies for audio engineers

    Even with perfect technique, some rim clicks slip through during recording sessions. Audio engineers have several tools to minimize their impact in the final mix.

    Microphone placement techniques

    Strategic mic positioning can reduce rim click pickup. Place your primary snare mic slightly off-center, aimed at the drumhead rather than the rim. This angle captures more head tone and less rim attack.

    Try positioning the mic about two to three inches above the head. This height captures the full drum tone while reducing the sharpness of incidental rim contact.

    Consider using a second mic underneath the snare to capture the snare wire response. This gives you mixing flexibility and reduces reliance on the top mic, which picks up more rim noise.

    EQ and filtering approaches

    Rim clicks live in the high-frequency range, typically between 3kHz and 8kHz. A narrow notch filter in this range can reduce rim click prominence without destroying the snare’s natural brightness.

    Start with a gentle cut around 5kHz. Use a narrow Q setting to target the rim click frequency specifically. Listen carefully to avoid removing too much of the snare’s desirable attack.

    High-pass filtering below 80Hz cleans up low-end rumble that can make rim clicks sound more pronounced by comparison. A cleaner low end helps the desired snare tone stand out.

    A seasoned recording engineer once told me that the best way to fix rim clicks is to not record them in the first place. Spend time getting the performance right rather than relying on post-production fixes. Your mix will thank you.

    Using gates and transient shapers

    A properly set noise gate can reduce the volume of quieter rim clicks between intended hits. Set the threshold just below your desired snare hits so that accidental rim grazes don’t trigger the gate to open.

    Transient shapers allow you to reduce the initial attack of rim clicks while preserving the snare’s body. Decrease the attack parameter slightly to soften the sharp click without dulling the overall drum sound.

    Be careful not to over-process. Heavy gating or transient shaping can make your snare sound unnatural or disconnected from the rest of the kit.

    Practice exercises for better control

    Deliberate practice builds the muscle memory needed for consistent, rim-free playing. These exercises target the specific skills that prevent unwanted rim contact.

    1. Start with slow, controlled single strokes at the drumhead’s exact center. Play at 60 BPM, focusing entirely on landing each stroke in the same spot. Gradually increase tempo only after achieving perfect consistency.

    2. Practice dynamic control by playing a series of strokes from pianissimo to fortissimo without changing your strike location. This teaches you to control volume through stick speed rather than height or position changes.

    3. Set up a practice pad next to your snare and alternate between them. The immediate contrast helps you notice when your hands drift off-center. The pad provides instant feedback since rim clicks are impossible on a flat surface.

    4. Record yourself during practice sessions. Audio recordings reveal rim clicks you might not notice while playing. Video recordings show hand position and stroke path issues that cause rim contact.

    5. Practice with your eyes closed for short periods. This removes visual feedback and forces you to rely on muscle memory and feel. You’ll quickly notice if your hands naturally drift toward the rim.

    Equipment considerations

    Sometimes the gear itself contributes to rim click problems. A few adjustments can make clean articulation easier to achieve.

    Drumhead selection

    Thicker drumheads provide a larger sweet spot and more forgiving playing surface. A two-ply head or a head with a center dot offers more mass in the strike zone, which can help reduce the prominence of rim clicks.

    Coated heads tend to produce a warmer tone that makes occasional rim clicks less jarring compared to clear heads. The coating also provides a slightly softer surface that’s more forgiving of minor technique imperfections.

    Rim height and type

    Some snare drums feature lower-profile rims that reduce the chance of accidental contact. If you consistently struggle with rim clicks despite good technique, consider whether your drum’s rim design works against you.

    Die-cast rims sit higher than triple-flanged rims. While die-cast hoops offer tonal benefits, they also present a larger target for unwanted stick contact. Triple-flanged rims provide more clearance between the head and the metal.

    Stick selection

    Heavier sticks with more mass can help improve consistency. The added weight provides momentum that helps the stick follow through to the drumhead rather than bouncing off at odd angles.

    Stick tip shape affects how forgiving the drum is to slightly off-center hits. Round tips provide more consistent tone across the drumhead surface compared to barrel or acorn shapes.

    Building long-term consistency

    Eliminating rim clicks permanently requires building habits that support clean playing even under pressure or fatigue.

    • Warm up properly before every playing session to ensure your muscles are ready for precise control
    • Monitor your hand position throughout rehearsals and performances, not just during focused practice
    • Film yourself regularly to catch technique drift before it becomes ingrained
    • Work with a teacher or experienced drummer who can provide external feedback on your stroke mechanics
    • Build endurance gradually so fatigue doesn’t compromise your technique during long sessions

    Consistency comes from repetition of correct movements. Every practice session where you prioritize centered, controlled strokes reinforces the neural pathways that make clean articulation automatic.

    Pay attention to your physical state. Hunger, dehydration, and lack of sleep all affect fine motor control. Taking care of your body supports your technical goals.

    Making clean articulation automatic

    The path from conscious technique adjustment to unconscious competence takes time and patience. Rim clicks will become less frequent as your muscle memory adapts to centered striking patterns.

    Start by implementing one or two changes from this guide rather than trying to fix everything at once. Focus on stick height control for a week, then add hand position awareness the following week. Gradual integration leads to lasting improvement.

    Remember that even professional drummers occasionally hit a rim. The goal isn’t perfection but rather consistent, reliable technique that minimizes unwanted clicks. With focused practice and awareness of the factors that cause rim contact, you’ll develop the control needed for clean snare articulation in any musical context.

  • How to Build Rock-Solid Breath Support for High Brass Endurance

    You’ve been there. Third set of the show, your lips are still fresh, but your sound starts to fade. Your tone gets thin. Notes that felt easy in warmup now feel like climbing a mountain.

    The problem isn’t your chops. It’s your air.

    Most brass players think they know how to breathe. After all, we’ve been doing it since birth. But breathing for survival and breathing for performance are completely different skills. Drum corps brass sections prove this every summer, playing demanding repertoire at high volumes while marching at 180 beats per minute. They’re not superhuman. They just understand how breath support actually works.

    Key Takeaway

    Effective breath support for brass players comes from engaging your entire respiratory system, not just your lungs. By learning to control your diaphragm, intercostal muscles, and abdominal wall, you’ll build the endurance needed for long performances. This guide covers the mechanics, common mistakes, and practical exercises that drum corps musicians use to maintain consistent tone and power throughout demanding shows.

    Understanding the Real Mechanics

    Your lungs don’t have muscles. Let that sink in for a moment.

    The lungs themselves are passive organs. They expand and contract because of the muscles around them. When you understand which muscles do what, you can train them like any other part of your body.

    The diaphragm sits at the bottom of your rib cage, separating your chest cavity from your abdomen. When it contracts, it moves down and creates space for your lungs to expand. Your intercostal muscles between your ribs help expand your chest in all directions. Your abdominal muscles control how fast air leaves your body.

    Think of it like a bellows. You need strength to open it, but you also need control to manage the airflow. Most players focus only on getting air in. The magic happens in how you let it out.

    Here’s what happens during a proper breath cycle for brass playing:

    1. Your diaphragm contracts and moves down
    2. Your lower ribs expand outward (not just forward)
    3. Your abdomen expands as your diaphragm pushes down
    4. Air rushes in to fill the space
    5. Your abdominal muscles engage to control the release
    6. Your diaphragm slowly relaxes while maintaining support

    Notice that your shoulders and upper chest barely move. If you’re lifting your shoulders when you breathe, you’re using the smallest, weakest part of your respiratory system.

    Common Mistakes That Kill Endurance

    How to Build Rock-Solid Breath Support for High Brass Endurance - Illustration 1

    Most brass players sabotage their own breathing without realizing it. These habits feel natural because we’ve done them for years, but they’re working against us.

    Mistake Why It Hurts Better Approach
    Shoulder breathing Uses only upper chest, creates tension Expand lower ribs and abdomen
    Holding tension Restricts airflow, tires muscles faster Stay relaxed except core muscles
    Pushing too hard Wastes air, creates pressure spikes Steady, consistent support
    Shallow breathing Never fully fills lungs Take full, deep breaths
    Forgetting to exhale Starts next breath with stale air Empty completely before inhaling

    The shoulder breathing habit is the worst offender. When you lift your shoulders, you’re recruiting your neck and upper chest muscles. These are small, weak muscles that fatigue incredibly fast. You might get a decent breath for one phrase, but by the tenth phrase, you’re exhausted.

    Tension is the silent killer. Many players tighten their throat, jaw, or shoulders while playing. This restriction means you need more air pressure to produce the same sound. More pressure means faster fatigue. It’s like trying to water your garden with a kinked hose.

    Building Your Foundation

    Before you can support a phrase, you need to know what proper breathing feels like. These exercises will help you find the right muscles and build awareness.

    The floor exercise

    Lie flat on your back with your knees bent, feet flat on the floor. Place one hand on your chest and one on your abdomen. Take a slow breath in through your nose. The hand on your abdomen should rise significantly. The hand on your chest should barely move.

    This position makes it almost impossible to use your shoulders. Gravity helps your diaphragm work more efficiently. Spend five minutes each day breathing this way. Focus on the sensation of your lower ribs expanding in all directions, not just your belly rising.

    The book test

    Stay on the floor. Place a heavy book on your abdomen. Breathe in and watch the book rise. Now exhale on a hiss, keeping the book elevated as long as possible. Your abdominal muscles should engage to control the descent.

    This teaches you the feeling of support. You’re not pushing hard. You’re maintaining steady pressure as air leaves your body. Time yourself. Work up to 20 seconds or more.

    Standing translation

    Once you’ve mastered the floor work, stand up and recreate the same feeling. Place your hands on your lower ribs, thumbs pointing back. Breathe in and feel your ribs expand outward and back. Your hands should move apart.

    Many players lose the feeling when they stand because old habits kick in. Keep practicing until standing feels as natural as lying down.

    Exercises That Build Real Endurance

    Now we get to the work that transforms your playing. These exercises come straight from drum corps brass pedagogy, where endurance isn’t optional.

    Breath attacks

    1. Take a full, supported breath
    2. Play a comfortable middle register note forte
    3. Hold it for 4 counts at a steady dynamic
    4. Breathe and repeat without stopping
    5. Continue for 2 minutes straight

    The goal isn’t to see how long you can hold one note. It’s to train your body to take efficient breaths and immediately support the sound. In a real performance, you rarely get long breaks. You need to breathe and play, breathe and play, over and over.

    Start at 4 counts. When that feels comfortable, increase to 8, then 12, then 16. Always maintain the same tone quality from first note to last.

    Crescendo control

    Play a long tone starting at pianissimo. Gradually crescendo to fortissimo over 16 counts, then decrescendo back to pianissimo over another 16 counts. Your air speed increases for the crescendo, but your support must stay consistent.

    This exercise reveals weaknesses immediately. If your tone wavers or cracks, you’re losing support. If you run out of air early, you’re pushing too hard at the forte. The goal is smooth, even control from softest to loudest and back.

    “The best brass players I’ve worked with all have one thing in common: they never run out of air because they never waste it. Every bit of air they take in becomes sound. That efficiency comes from years of focused breathing practice, not from having bigger lungs.” – Brass caption head with multiple DCI championship corps

    Phrase simulation

    Find a challenging phrase from your repertoire. Play it once, then immediately play it again without taking an extra breath beyond what’s written. Then play it a third time. Then a fourth.

    This simulates the fatigue you’ll feel in performance. If you can play a phrase four times in a row with consistent tone and intonation, you’ll have plenty of reserve for a single performance.

    Integrating Support Into Performance

    Knowing the mechanics is one thing. Using them under pressure is another.

    During rehearsal, designate specific run-throughs as “breathing focus” runs. Don’t worry about perfection. Focus entirely on taking full breaths and maintaining support. Notice where you tend to get lazy or tense up. Those are your target areas.

    Many players breathe well during warmup but abandon good technique when the music gets challenging. The brain gets busy reading notes and suddenly you’re back to shoulder breathing. Building new habits takes conscious repetition.

    Pre-performance breathing routine

    Before you play, establish your breathing:

    • Take three slow, full breaths lying down or seated
    • Stand and take three more, maintaining the same feeling
    • Play a few notes to confirm your support is engaged
    • Begin your performance

    This routine takes less than two minutes but centers your focus on the foundation of your sound. Make it as automatic as checking your tuning.

    Marking difficult passages

    In your music, mark every breath with a check mark or comma. Then mark every spot where you tend to lose support with a different symbol. During practice, pause at those spots and reset your breathing. Over time, good support becomes automatic even in the hardest sections.

    Breathing for Different Registers

    The fundamentals stay the same across your range, but the application changes.

    Low register

    Low notes need lots of air moving slowly. Your oral cavity should be open and relaxed. Support comes from steady abdominal engagement, not pushing. Think of pouring honey: slow, thick, consistent flow.

    Many players try to force low notes by pushing harder. This creates a harsh, unfocused sound. Instead, open your throat and let the air move freely with gentle support.

    Middle register

    This is your home base. Middle register should feel comfortable and sustainable. If you’re getting tired playing in the middle of your range, something is wrong with your breathing.

    Use middle register exercises to build your foundation. Once you can play middle G or middle C with perfect support for minutes at a time, the rest of your range gets easier.

    High register

    High notes need faster air, but not more pressure. Think of the difference between a garden hose and a pressure washer. The pressure washer uses less water but moves it faster.

    Your abdominal support becomes more active in the high register, but your throat and embouchure stay relaxed. Tension kills high notes faster than anything else. The air speed comes from faster abdominal engagement, not from squeezing your throat.

    Troubleshooting Your Technique

    Even with good instruction, you’ll hit plateaus. Here’s how to diagnose common issues.

    Problem: Running out of air too fast

    Check your embouchure first. If you’re squeezing too hard, you’re creating resistance. Your body compensates by pushing more air, which depletes your supply faster.

    Next, check for air leaks. Record yourself playing and listen for hissing sounds. Any air that’s not becoming sound is wasted.

    Finally, check your breath capacity. Can you exhale completely on a hiss for 20+ seconds? If not, you need more capacity work.

    Problem: Tone quality deteriorates over time

    This usually means your support is fading. Your embouchure is trying to compensate for weak air support, which creates tension and fatigue.

    Go back to the book test. Can you maintain steady pressure for the full length of your exhale? If your abdominal muscles give out early, that’s your weak point.

    Problem: Breathing feels uncomfortable or forced

    You’re probably trying too hard. Good breathing should feel natural and easy. If you’re straining, you’re using the wrong muscles or creating unnecessary tension.

    Return to the floor exercise. Relearn the feeling of effortless expansion. Then transfer that feeling to your standing posture. Never force it.

    The Practice Schedule That Works

    You can’t build endurance in a single week. Plan for consistent work over months.

    Week 1-2: Awareness

    Spend 10 minutes daily on floor breathing. Focus entirely on feeling the right muscles engage. Don’t touch your instrument yet. This feels boring, but it’s essential.

    Week 3-4: Translation

    Continue floor work for 5 minutes. Add 5 minutes of standing breathing without the instrument. Add 5 minutes of breathing with long tones on your instrument.

    Week 5-8: Integration

    Reduce isolated breathing work to 5 minutes. Spend 15 minutes on long tone exercises with focus on support. Start applying these techniques to real repertoire.

    Week 9+: Maintenance

    Keep breathing exercises as part of your daily warmup. Focus on maintaining good technique during challenging music. Your support should now feel automatic most of the time.

    The timeline varies by player. Some pick it up in weeks. Others need months. Don’t rush it. Bad breathing habits took years to develop. Good ones take time to replace them.

    Your Sound Starts With Your Breath

    Every great brass sound you’ve ever heard started with a great breath. The players on your favorite drum corps recordings aren’t just talented. They’ve trained their breathing like athletes train their bodies.

    The good news is that breathing is trainable. You don’t need special genetics or expensive equipment. You need awareness, patience, and consistent practice. Start with the floor exercise today. Build from there. In a few months, you’ll wonder how you ever played without proper support.

    Your endurance will improve. Your tone will get richer. Those difficult passages will feel manageable. All because you learned to breathe like you mean it.

  • How to Build a Perfect 30-Minute Individual Practice Routine

    You don’t need hours to make real progress. Thirty minutes of focused, structured practice can outperform two hours of wandering through exercises without a plan. The secret isn’t more time. It’s better structure.

    Key Takeaway

    A 30 minute practice routine works best when divided into four focused blocks: warmup (5 minutes), fundamentals (10 minutes), challenge work (10 minutes), and cooldown (5 minutes). This structure builds skills efficiently while preventing burnout. Consistency matters more than duration, and a well-designed short session beats a long, unfocused one every time.

    Why 30 minutes works better than you think

    Most people assume longer practice sessions automatically mean better results. That’s not how skill development works.

    Your brain can only maintain peak focus for limited windows. After about 20 to 30 minutes of intense concentration, attention starts to drift. Mistakes creep in. You stop noticing what you’re doing wrong.

    Short sessions force you to prioritize. You can’t waste five minutes scrolling your phone or noodling around aimlessly. Every minute has a job.

    This approach also fits real life. You might not have two hours free, but almost everyone can carve out 30 minutes before work, during lunch, or after dinner. Practicing six days a week for 30 minutes beats practicing twice a week for 90 minutes. Repetition builds neural pathways. Gaps between sessions let those pathways weaken.

    The four-block framework

    How to Build a Perfect 30-Minute Individual Practice Routine - Illustration 1

    Breaking your session into distinct blocks creates natural momentum. Each section has a clear purpose, and you move through them knowing exactly what comes next.

    Here’s the basic structure:

    Block Duration Purpose Example Activities
    Warmup 5 minutes Prepare body and mind Breathing exercises, light stretching, simple scales
    Fundamentals 10 minutes Reinforce core technique Rudiments, tone production, posture drills
    Challenge work 10 minutes Push current limits New repertoire, difficult passages, speed building
    Cooldown 5 minutes Consolidate and reflect Play something familiar, write notes, plan tomorrow

    This framework adapts to almost any skill. Drummers, brass players, woodwinds, dancers, even visual artists can use the same basic structure.

    Setting up your warmup block

    Start slow and simple. Your warmup isn’t the place to impress anyone.

    The goal here is to wake up your muscle memory and get your mind focused. If you play a brass instrument, long tones work perfectly. Percussionists can run through basic stroke patterns on a pad. Dancers might do gentle stretches and balance work.

    Keep the difficulty low. You should feel comfortable and relaxed. This isn’t about pushing limits yet.

    Some people skip warmups because they feel like wasted time. That’s backwards thinking. A good warmup makes the rest of your session more productive. Cold muscles make more mistakes. A scattered mind retains less information.

    Set a timer for five minutes. When it goes off, move on. Don’t let your warmup bleed into the next block.

    Building your fundamentals block

    This is where you build the foundation that supports everything else.

    Fundamentals are the techniques you need every single time you perform. For brass players, that’s tone quality, articulation, and breath control. For drummers, it’s stick control, timing, and dynamics. For dancers, it’s posture, alignment, and basic positions.

    Pick two or three fundamental skills to work on during this block. Rotate them throughout the week so you’re not drilling the same thing every day.

    Here’s a sample rotation for a snare drummer:

    1. Monday: Single strokes and doubles
    2. Tuesday: Paradiddles and flam patterns
    3. Wednesday: Dynamics and accents
    4. Thursday: Timing with a metronome
    5. Friday: Buzz rolls and sustained sounds
    6. Saturday: Mixed rudiments at various tempos

    Notice how each day focuses on specific elements. This prevents you from trying to fix everything at once, which usually means fixing nothing.

    Use a metronome during this block. Start at a comfortable tempo where you can play cleanly. Gradually increase speed only when you can maintain perfect technique.

    “The fundamentals block is where championships are won. You can’t fake good basics under pressure. Build them when the stakes are low so they hold up when the stakes are high.” – Caption head instructor

    Ten minutes feels short, but it’s enough to make measurable progress if you stay focused. Track your metronome speeds in a notebook. Seeing those numbers climb over weeks and months proves you’re improving.

    Tackling your challenge work

    Now you get to work on the hard stuff.

    This block is for material that currently sits just beyond your comfortable skill level. Maybe it’s a difficult excerpt from your show music. Maybe it’s a technique you haven’t mastered yet. Maybe it’s playing something familiar at a faster tempo than you’ve managed before.

    The key word is “challenge,” not “impossible.” If you’re failing 90% of the time, the material is too hard. Scale it back. If you’re succeeding 90% of the time, it’s too easy. Push harder.

    Aim for a success rate around 60 to 70%. You should feel like you’re stretching, but not breaking.

    Break difficult passages into smaller chunks. Don’t try to run the whole thing at full speed right away. Isolate the trickiest two measures. Loop them slowly. Gradually increase tempo. Only when those two measures feel solid should you add the measures before and after.

    This is also where you can experiment. Try different sticking patterns. Test alternate fingerings. See what happens if you change your breathing or your grip. You won’t know what works best until you test options.

    Keep a practice journal nearby. When you figure out a breakthrough technique or notice a recurring mistake, write it down. Your future self will thank you.

    Cooling down the right way

    Most people quit the moment their timer hits 30 minutes. That’s a mistake.

    Your cooldown serves two purposes. First, it lets your body and mind transition out of intense focus mode. Second, it helps consolidate what you just learned.

    Play something you already know well. Something that feels good. This isn’t about improvement. It’s about ending on a positive note.

    Finishing with success puts you in the right mindset for your next session. If you end frustrated and exhausted, you’ll dread coming back tomorrow. If you end feeling confident, you’ll look forward to it.

    Spend the last minute or two reflecting. What went well today? What needs more attention tomorrow? What specific goal will you tackle next time?

    Write those thoughts down. They become your roadmap for the next session.

    Common mistakes that wreck 30 minute sessions

    Even with a solid structure, certain habits will sabotage your progress.

    Starting without a plan. Walking into your practice space without knowing what you’ll work on wastes precious minutes. Decide your focus areas the night before.

    Skipping the timer. You think you’ll just “feel” when five minutes is up. You won’t. Blocks will expand and contract randomly. Use your phone timer or a dedicated practice app.

    Practicing mistakes. If you keep playing something wrong, you’re teaching your muscles to do it wrong. Slow down until you can play it correctly, then gradually speed up.

    Ignoring rest days. Your body needs recovery time. Practicing seven days a week often leads to injury or burnout. Six days with one rest day works better for most people.

    Multitasking during practice. Put your phone in another room. Close the laptop. Tell your roommate you’re unavailable. Distraction turns a 30 minute session into a 50 minute session with 30 minutes of actual work.

    Adapting the framework for different skills

    The four-block structure works across disciplines, but the details change based on what you’re practicing.

    For brass players:
    – Warmup: Long tones, lip slurs, breathing exercises
    – Fundamentals: Scales, articulation patterns, range building
    – Challenge: Difficult excerpts, high/low register work, new repertoire
    – Cooldown: Favorite melody, light playing, equipment care

    For battery percussion:
    – Warmup: Stroke patterns on a pad, wrist stretches
    – Fundamentals: Rudiments with metronome, stick heights, timing grids
    – Challenge: Show music, speed building, complex sticking patterns
    – Cooldown: Favorite groove, equipment check, stick twirling if that’s your thing

    For color guard:
    – Warmup: Stretching, basic tosses, footwork review
    – Fundamentals: Drop spins, body work, equipment control
    – Challenge: New choreography, difficult tosses, speed cleaning
    – Cooldown: Run-through of clean work, flexibility, visualization

    The percentages stay roughly the same. Adjust the specific activities to match your instrument or discipline.

    Tracking progress without obsessing

    You need some way to measure improvement, or you’ll lose motivation. But tracking can become its own time sink if you’re not careful.

    Keep it simple. A basic notebook works fine. Each day, jot down:

    • Date and time of practice
    • What you worked on in each block
    • One win (something that improved)
    • One focus for next time

    That’s it. Four lines. Takes 30 seconds to write.

    Every two weeks, flip back through your notes. You’ll spot patterns. Maybe your fundamentals block always feels rushed. Maybe Tuesdays are consistently better than Thursdays. Maybe you’ve been avoiding a particular technique.

    These patterns tell you what to adjust. Don’t wait for someone else to point out your weak spots. Your practice journal will show you.

    Making it stick long term

    The hardest part isn’t designing a good 30 minute practice routine. It’s showing up consistently.

    Pick the same time every day. Your brain likes patterns. If you practice at 7pm every evening, it becomes automatic. You don’t have to decide whether to practice or negotiate with yourself about when. The time arrives, you practice.

    Prepare your space the night before. Lay out your sticks, music stand, metronome, and notebook. When practice time comes, everything is ready. No excuses about needing to find your tuner or dig out your music.

    Tell someone your schedule. Accountability helps. Text a friend after each session. Join an online community where people post their practice logs. Knowing someone might ask keeps you honest.

    Forgive missed days without spiraling. You’ll skip sometimes. Life happens. One missed session doesn’t ruin your progress. But letting one missed day become three, then five, then a whole week will set you back. Get back on schedule the next day.

    Your next 30 minutes

    You now have a complete framework. Four blocks, clear purposes, specific activities. You know what mistakes to avoid and how to track progress.

    The structure works because it matches how your brain actually learns. Short, focused bursts with clear goals. Repetition spread over time. Immediate feedback. Gradual difficulty increases.

    You don’t need a coach standing over you. You don’t need a three-hour block of free time. You need 30 minutes, a timer, and a plan.

    Set up your first session tonight. Write down what you’ll work on in each block. Set out your equipment. Pick your practice time for tomorrow.

    Then show up and run the routine. Just once. See how it feels.

    After a week, you’ll notice sharper focus. After a month, you’ll see measurable skill improvements. After three months, this structure will feel as natural as breathing.

    The perfect 30 minute practice routine isn’t about perfection. It’s about showing up, following a system, and trusting the process to build your skills one focused session at a time.

  • 5 Essential Breathing Exercises Every Brass Player Should Master

    Playing a brass instrument demands more than just moving your fingers and reading notes. Your breath is the engine that powers every sound you create, and without proper control, even the most talented player will struggle with tone, endurance, and consistency.

    Key Takeaway

    Mastering breath control transforms your brass playing from adequate to exceptional. These five breathing exercises target diaphragm strength, air capacity, breath support, and controlled release. Practice them daily for ten minutes to build the foundation for better tone quality, extended phrases, and confident performance. Each exercise addresses specific technical challenges brass players face, from maintaining steady air pressure to eliminating tension during demanding passages.

    Most brass players focus on fingerings, embouchure, and repertoire while treating breathing as something that just happens naturally. That’s a mistake. The difference between a good brass player and a great one often comes down to breath management. Professional musicians spend years refining their breathing technique because it directly impacts every aspect of their sound.

    The exercises below target different aspects of breath control. Some build capacity. Others develop support. A few focus on the release and control of air. Together, they create a complete system for breathing that will transform your playing.

    Building Your Foundation With Diaphragmatic Breathing

    Your diaphragm is the large muscle beneath your lungs that does the heavy lifting when you breathe properly. Many players breathe shallowly from their chest, which limits air capacity and creates tension in the shoulders and neck.

    Lie flat on your back with one hand on your chest and the other on your stomach. Breathe in slowly through your nose, focusing on expanding your belly while keeping your chest relatively still. Your stomach hand should rise significantly while your chest hand barely moves.

    This is diaphragmatic breathing. It feels strange at first if you’ve been a chest breather your whole life.

    Practice this position for five minutes daily. Once you can consistently breathe from your diaphragm while lying down, try it sitting in a chair. Then try it standing with your instrument. The goal is to make this your default breathing pattern, both on and off the horn.

    “The diaphragm is the most important muscle you have as a brass player. Everything else is secondary. Master this first, and the rest becomes easier.” – Arnold Jacobs, legendary tuba player and teacher

    The Four-Count Breathing Cycle

    5 Essential Breathing Exercises Every Brass Player Should Master - Illustration 1

    This exercise builds both capacity and control while establishing a rhythm that mirrors musical phrasing.

    1. Inhale through your nose for four counts, filling your lungs from bottom to top using diaphragmatic breathing.
    2. Hold your breath for four counts without tensing your throat or chest.
    3. Exhale through your mouth for four counts, maintaining steady air pressure throughout.
    4. Hold empty for four counts before beginning the next cycle.

    Start with four counts for each phase. As you improve, extend to six counts, then eight. The key is maintaining consistency. Your exhale should be just as controlled at count eight as it was at count one.

    This exercise teaches you to manage air pressure over extended phrases. It also builds the mental discipline to stay relaxed while holding your breath, which translates directly to playing long notes without tension.

    Resistance Breathing for Strength and Endurance

    Your breathing muscles need strength training just like any other muscle group. Resistance breathing builds that strength.

    Place your hand loosely over your mouth, creating partial resistance. Breathe in against this resistance, feeling your diaphragm work harder to pull air in. Then exhale against the same resistance, maintaining steady pressure.

    Do three sets of ten breaths with 30-second rest periods between sets. You can also use a straw in a glass of water, blowing bubbles at a consistent rate. The water provides resistance that strengthens your breathing muscles.

    This exercise is particularly valuable for players who struggle with endurance during long rehearsals or performances. The resistance forces your muscles to work harder than normal breathing requires, building strength that makes regular playing feel easier.

    Sustained Tone Breathing Practice

    This exercise connects your breathing directly to sound production. You’ll need your instrument for this one.

    Take a full breath using diaphragmatic technique. Play a comfortable middle register note at a moderate dynamic level. Sustain it as long as possible while maintaining consistent tone quality, pitch, and volume.

    Time yourself. Write down your results. Most beginners start between 15 and 25 seconds. Intermediate players often reach 30 to 45 seconds. Advanced players can sustain for a minute or longer.

    The goal isn’t just duration. Focus on keeping the sound steady from beginning to end. Many players start strong but fade or go sharp as they run out of air. That reveals problems with air support and embouchure stability.

    Practice this daily with different notes across your range. Low notes typically require more air. High notes need faster air speed but less volume. Understanding these differences helps you manage your breath more efficiently.

    The Breathing Gym Approach

    The Breathing Gym system, developed by Sam Pilafian and Patrick Sheridan, offers structured exercises that combine physical movement with breathing. These exercises are used by professional brass players worldwide.

    Here are three core movements you can start with:

    Stretches: Reach your arms overhead while inhaling deeply. Hold briefly, then lower your arms while exhaling completely. This opens your ribcage and encourages full lung expansion.

    The Lift: Stand with feet shoulder-width apart. Inhale while raising your arms to the sides and overhead. Exhale while lowering them. Coordinate the breath with the movement so they finish simultaneously.

    The Shoulder Shrug: Inhale while raising your shoulders toward your ears. Hold for two counts. Exhale while dropping your shoulders completely. This releases tension that many brass players carry in their upper body.

    Perform each movement ten times before your practice session. They serve as both warm-up and breathing exercise, preparing your body for efficient air use.

    Exercise Primary Benefit Common Mistake Correction
    Diaphragmatic Breathing Builds proper breathing foundation Chest rises instead of belly Place hand on stomach to monitor movement
    Four-Count Cycle Develops controlled air release Rushing the exhale phase Use metronome to maintain consistent tempo
    Resistance Breathing Strengthens breathing muscles Creating too much resistance Start with light resistance and build gradually
    Sustained Tone Connects breath to sound production Letting tone quality deteriorate Stop before tone degrades, build gradually
    Breathing Gym Releases tension, increases capacity Separating breath from movement Coordinate breathing and movement as one action

    Common Breathing Problems and How to Fix Them

    Even with regular practice, brass players encounter specific breathing challenges. Understanding these problems helps you address them directly.

    Running out of air too soon: This usually indicates shallow breathing or excessive air waste. Focus on taking fuller breaths using your diaphragm. Also check that you’re not blowing too hard. Many players use twice as much air as necessary.

    Tension in shoulders and neck: This happens when you breathe from your chest instead of your diaphragm. Return to the foundational lying-down exercise until diaphragmatic breathing becomes automatic.

    Inconsistent air pressure: Your sound wavers or changes volume unintentionally. Practice the four-count breathing cycle and sustained tone exercises. These build the control needed for steady air support.

    Gasping or noisy breaths: You’re creating tension in your throat. Open your throat as if yawning. The air should flow silently and smoothly.

    Dizziness during practice: You’re either hyperventilating or breathing too shallowly. Take normal breaths between exercises. Don’t overdo the breathing work, especially when starting out.

    Creating Your Daily Breathing Routine

    Consistency matters more than marathon practice sessions. Ten focused minutes daily beats an occasional hour-long workout.

    Here’s a practical routine that covers all the essential areas:

    • Minutes 1-2: Diaphragmatic breathing while lying down or sitting (20 breaths)
    • Minutes 3-5: Four-count breathing cycle (10 complete cycles)
    • Minutes 6-7: Resistance breathing with hand or straw (3 sets of 10)
    • Minutes 8-9: Sustained tone practice on three different notes
    • Minute 10: Breathing Gym stretches and movements

    Do this routine before your regular practice session. It serves as a warm-up while building the breathing skills you’ll use throughout your playing.

    Track your progress weekly. Note your sustained tone times. Record how the exercises feel. This documentation helps you see improvement that might otherwise go unnoticed.

    Breathing Technique Across Different Brass Instruments

    Each brass instrument presents unique breathing challenges based on its size, range, and typical repertoire.

    Trumpet players need efficient breathing for rapid passages and high register work. Focus on taking faster, fuller breaths during short rests. Practice the four-count cycle at quicker tempos.

    Trombone players often deal with long, sustained passages in various positions. Sustained tone exercises are particularly valuable. Work on maintaining consistent air pressure while moving the slide.

    French horn players face perhaps the most demanding breathing requirements due to the instrument’s resistance and wide range. All five exercises are essential. Pay special attention to resistance breathing to build the strength needed.

    Tuba and euphonium players require the largest air capacity. Diaphragmatic breathing is absolutely critical. Practice taking maximum breaths efficiently. You need volume, but you also need to fill your lungs quickly during brief rests.

    Despite these differences, the fundamental principles remain the same. Every brass player benefits from proper diaphragmatic breathing, controlled air release, and strong breathing muscles.

    Breathing Exercises Away From Your Instrument

    You don’t need your horn to improve your breathing. In fact, some of the most effective practice happens without it.

    Try these activities:

    • Swimming builds breath capacity and control naturally. The resistance of water and need to coordinate breathing with movement translates directly to brass playing.
    • Yoga and meditation practices emphasize diaphragmatic breathing and body awareness. Many professional musicians incorporate these into their routines.
    • Cardio exercise improves overall lung capacity and efficiency. Running, cycling, or brisk walking all contribute to better breathing.
    • Simple awareness throughout your day helps. Notice how you breathe while sitting at your desk, walking between classes, or watching TV. Make diaphragmatic breathing your default.

    These activities complement your focused breathing exercises. They build the general fitness and awareness that supports your specific musical goals.

    Making Breathing Exercises Part of Your Musical Life

    These five breathing exercises form the foundation of solid brass technique. They’re not separate from music making. They are music making.

    Your breath creates every sound you produce. The quality of that breath determines the quality of your tone, the length of your phrases, the consistency of your pitch, and your endurance through demanding passages.

    Start today with just one exercise. Master it before adding the next. Build your routine gradually until these techniques become second nature. Within weeks, you’ll notice differences in your playing. Within months, the changes will be dramatic.

    The best brass players in the world still practice breathing exercises daily. They understand that maintaining these fundamentals is what separates good playing from great playing. Your breath is your most important tool. Treat it that way, and everything else will improve.

  • DCI Announces Major Rule Changes for the 2025 Competitive Season

    Drum Corps International just dropped some of the most significant rule updates in recent memory, and they’re going to reshape how corps design and perform their shows this summer. Whether you march, teach, or just love watching world class drum corps, these changes will affect what you see on the field in 2025.

    Key Takeaway

    DCI’s 2025 rule changes introduce expanded electronics policies, new prop safety standards, revised judging criteria for visual design, and updated rehearsal time limits. These modifications aim to balance creative innovation with performer safety while maintaining competitive fairness. Corps directors and designers must adapt their show concepts to comply with the new framework before the season begins.

    Electronics and amplification get a major update

    The electronics policy has been the hot topic in drum corps circles for years, and DCI finally addressed it head on.

    Starting in 2025, corps can use up to eight wireless microphones for vocalists or wind players. That’s double the previous limit of four. The catch? All amplified sound must originate from performers actively on the field during competition. No pre recorded vocals or instrumental tracks are allowed.

    This change opens up massive creative possibilities for arrangers and designers. We’ll likely see more complex vocal arrangements, layered harmonies, and integrated singing throughout shows rather than just in isolated moments.

    The rule also clarifies that all amplification equipment must be visible to judges and audience members. Hidden speakers or disguised sound systems are explicitly banned. If you’re amplifying something, everyone needs to see where that sound is coming from.

    One more thing: corps must submit their electronics setup diagram to DCI officials at least 72 hours before their first regional performance. Late submissions result in penalties that can affect placement.

    Prop construction faces stricter safety standards

    DCI Announces Major Rule Changes for the 2025 Competitive Season - Illustration 1

    Props have gotten increasingly elaborate over the past decade. Some corps roll out massive structures that transform the entire field.

    DCI recognized that innovation was outpacing safety protocols, so they implemented new construction requirements.

    All props taller than 12 feet must now undergo third party structural engineering review. Corps need to submit certification documents proving their props can withstand specific wind loads and stress conditions. The engineering report must be filed with DCI by May 1, 2025.

    Props with moving parts, rotating sections, or mechanical components face additional scrutiny. Any motorized element requires a dedicated safety operator who cannot be a performing member. That person must remain within 15 feet of the prop throughout the entire performance.

    The rules also ban certain materials outright:

    • Glass or mirrored surfaces larger than 6 square inches
    • Pyrotechnic devices or open flame elements
    • Loose materials that could create slip hazards (sand, water, loose fabric)
    • Sharp edges or protruding elements above performer head height

    These restrictions might seem limiting, but they’re designed to prevent the kind of accidents that have occasionally happened during rehearsals and performances.

    Judging criteria shifts toward holistic design

    The judging system got a significant overhaul that changes how scores are calculated and weighted.

    Visual design now carries equal weight to brass performance in the overall score calculation. Previously, brass had a slight edge in the formula. This change reflects the reality that modern drum corps shows are complete theatrical experiences, not just musical showcases.

    The general effect caption, which evaluates how all elements work together, now accounts for 25% of the total score. That’s up from 20% in previous seasons.

    Here’s how the new scoring breakdown looks:

    Caption 2024 Weight 2025 Weight Change
    Brass Performance 22% 20% -2%
    Visual Performance 20% 20% No change
    Percussion 18% 18% No change
    Color Guard 15% 15% No change
    General Effect 20% 25% +5%
    Music Design 5% 2% -3%

    The shift toward general effect means judges will pay more attention to storytelling, emotional impact, and how well all sections integrate. A technically perfect brass line won’t guarantee a win if the show concept feels disconnected or the visual program doesn’t support the musical choices.

    Judges also received updated training materials that emphasize contemporary design trends. They’re specifically instructed to avoid penalizing innovative approaches that don’t fit traditional drum corps conventions, as long as those approaches serve the show’s artistic vision.

    Rehearsal time limits aim to protect member wellness

    DCI Announces Major Rule Changes for the 2025 Competitive Season - Illustration 2

    DCI introduced caps on rehearsal hours that corps must follow throughout the season.

    During spring training (typically late May through mid June), corps can rehearse a maximum of 12 hours per day. That includes all on field time, sectionals, ensemble rehearsal, and visual block. Meals, breaks, and travel time don’t count toward the limit.

    Once the tour starts, the daily limit drops to 10 hours. Corps must also provide at least one full day off per week where no rehearsal, travel, or performance activities occur.

    These limits respond to growing concerns about member burnout and injury rates. Several studies have shown that excessive rehearsal hours correlate with higher rates of heat illness, overuse injuries, and mental health challenges among performers.

    “We want drum corps to remain challenging and demanding, but not at the expense of member health. These time limits force staff to be more efficient with rehearsal planning and give members the recovery time their bodies need.” (DCI Executive Director)

    Corps that violate rehearsal time limits face escalating penalties:

    1. First violation: written warning and mandatory staff meeting with DCI officials
    2. Second violation: $5,000 fine and probationary status
    3. Third violation: suspension from competition for one event

    Staff members are required to maintain daily logs documenting all rehearsal activities, break times, and member rest periods. DCI can request these logs at any time for review.

    Uniform and costume regulations get clarification

    The uniform rules received some tweaks that clear up gray areas from previous seasons.

    Footwear must now provide “adequate ankle support and sole cushioning appropriate for athletic activity.” That’s deliberately vague to allow design flexibility, but it rules out purely decorative shoes that don’t protect performers’ feet during demanding choreography.

    Headwear is fully permitted as long as it doesn’t obstruct the performer’s vision or create safety hazards. We’ve seen shakos, helmets, crowns, and all sorts of creative headpieces in recent years. Those remain legal under the 2025 rules.

    The regulations also explicitly allow costume changes during performances, but with conditions. Any costume piece removed during the show must be immediately secured by a designated crew member. Performers can’t just drop jackets or accessories on the field where they might create trip hazards.

    Corps must submit photos and detailed descriptions of all uniform variations to DCI by June 1. Last minute costume changes after that deadline require special approval and may incur fees.

    What these changes mean for competitive strategy

    Smart corps directors are already rethinking their 2025 show designs based on these new parameters.

    The expanded electronics policy will likely push more corps toward shows with significant vocal components. Expect to hear more singing, spoken word elements, and amplified wind solos. Arrangers who can write compelling vocal parts while maintaining strong brass and percussion books will have an advantage.

    The increased weight on general effect means show concept matters more than ever. A clear, emotionally resonant story told through integrated visual and musical design will score better than a technically impressive but thematically scattered program.

    Prop designers face a more complex approval process, but that doesn’t mean we’ll see fewer props. It just means the props we do see will be engineered more carefully. Corps with bigger budgets for structural engineering and safety compliance might gain an edge here.

    The rehearsal time limits level the playing field somewhat. Corps that previously gained advantages through marathon rehearsal schedules now need to focus on training efficiency and smart pedagogical approaches. Quality of instruction matters more than quantity of hours.

    How to follow rule compliance throughout the season

    Fans and participants can track how corps adapt to these changes as the season unfolds.

    DCI posts penalty reports on their website after each event. These reports detail any rule violations, fines assessed, or warnings issued. They’re usually published within 48 hours of competition.

    Corps are also required to maintain public compliance documentation for their prop engineering reports and electronics setup diagrams. Most corps post these on their websites or make them available upon request.

    If you’re marching this summer, make sure your corps staff has briefed you on the new rehearsal time limits. You have the right to speak up if you feel those limits aren’t being respected. DCI established a confidential reporting system where members can flag potential violations without fear of retaliation.

    For instructors and designers, DCI is offering webinars throughout March and April that walk through the rule changes in detail. These sessions include Q&A time where you can get specific questions answered by officials who will be enforcing the rules.

    Planning your summer around the new format

    These rule changes affect more than just what happens on the field. They influence the entire drum corps experience.

    The rehearsal time limits mean tour schedules might look different. Corps need to build in more rest days and shorter rehearsal blocks. If you’re planning to visit a corps during their spring training or catch them at a rehearsal site during tour, check their updated schedules.

    The one mandatory day off per week creates opportunities for members to explore host cities, rest, and recover. Some corps are building educational or cultural activities into those off days rather than just letting members sleep.

    For fans attending shows, the new judging criteria means you might notice different patterns in how scores shake out. A corps that would have placed fourth under the old system might crack the top three if their general effect package is particularly strong.

    The electronics changes will be immediately audible. Shows will sound different in 2025, with more textural variety and vocal presence. Whether that enhances or distracts from the drum corps experience is something each fan will judge personally.

    Getting ready for an exciting season ahead

    These rule changes represent DCI’s attempt to balance tradition with innovation, safety with artistic freedom, and competitive fairness with creative expression.

    Some changes will work beautifully. Others might need adjustment after we see how they play out in real competition. That’s how rule evolution works in any activity.

    The corps that adapt most successfully will be those that view these rules not as restrictions but as creative parameters. The best designers thrive within boundaries, using constraints to spark innovation rather than limit it.

    If you’re performing this summer, trust that your staff is working hard to build a show that complies with all regulations while still pushing artistic boundaries. If you’re teaching, lean into the efficiency that rehearsal time limits demand. If you’re a fan, get ready to see drum corps continue evolving in exciting directions.

    The 2025 season is going to be memorable, and these rule changes are a big part of why.

  • How Bluecoats 2014 ‘Tilt’ Redefined Modern Drum Corps Design

    The summer of 2014 changed everything. When the Bluecoats took the field in Indianapolis for DCI Finals, they brought a show that made judges, fans, and competitors rethink what drum corps could be. Tilt wasn’t just a performance. It was a statement that tradition could bend, literally and figuratively, without breaking.

    Key Takeaway

    The Bluecoats 2014 Tilt show revolutionized drum corps by introducing tilted stage props, asymmetrical drill formations, and a fearless design philosophy that prioritized artistic risk over predictable symmetry. The show’s second place finish sparked debates about judging criteria while inspiring corps worldwide to embrace creative experimentation and challenge decades old design conventions in modern marching arts.

    What Made Tilt Different From Every Other Show

    Drum corps had followed a formula for decades. Symmetrical drill. Balanced staging. Props that sat flat on the field. Tilt threw that playbook out the window.

    The show’s defining feature was a massive stage prop that tilted at extreme angles throughout the performance. Members performed on slanted surfaces, defying gravity while playing demanding musical passages. The visual effect was disorienting and mesmerizing at the same time.

    But the tilted prop was just the beginning. The entire design philosophy rejected symmetry. Drill formations favored asymmetrical shapes. Musical phrases started and stopped in unexpected places. Even the color palette broke from the Bluecoats’ traditional blue and white, incorporating stark blacks and grays.

    Designer Dean Westman and the creative team built the show around a simple question: what happens when you take everything the audience expects and turn it sideways? The answer was a performance that felt dangerous, unpredictable, and utterly captivating.

    The Physical Demands That Pushed Members to Their Limits

    How Bluecoats 2014 'Tilt' Redefined Modern Drum Corps Design - Illustration 1

    Performing on a tilted surface isn’t just visually striking. It’s brutally difficult.

    Members had to relearn basic marching technique. Balance points shifted. Muscle memory from years of training on flat fields became a liability. The brass line played complex passages while leaning at angles that would make most people dizzy.

    The percussion section faced even greater challenges. Battery members navigated the tilted prop while maintaining perfect timing. Front ensemble players anchored their instruments on uneven surfaces, adjusting their playing positions constantly throughout the show.

    Here’s what made the physical execution so demanding:

    • Members rehearsed for months to build the specific muscle groups needed for tilted performance
    • Balance drills became a daily requirement, not an occasional exercise
    • The brass section developed new breathing techniques to compensate for tilted posture
    • Guard members choreographed tosses and catches accounting for altered spatial perception
    • The entire corps practiced emergency procedures for potential falls or equipment failures

    The risk was real. One misstep on the tilted surface could mean injury. The design team worked closely with safety consultants to ensure the prop met structural standards, but the human element remained unpredictable.

    How the Music Reinforced the Visual Concept

    Tilt’s musical program wasn’t an afterthought. Arranger John Meehan crafted a score that felt as off balance as the visual design.

    The show opened with a dissonant cluster of notes that resolved in unexpected ways. Traditional chord progressions gave way to angular harmonies. Rhythmic patterns shifted meters without warning, keeping the audience perpetually off balance.

    The repertoire drew from contemporary classical composers who specialized in asymmetry and tension. Béla Bartók’s “Music for Strings, Percussion and Celesta” provided the foundation, its eerie suspensions perfectly matching the visual unease of the tilted staging.

    But Meehan didn’t just transcribe existing music. He deconstructed it. Melodies appeared in fragments. Sections of the corps played different tempos simultaneously. The effect was controlled chaos, every note carefully planned to sound spontaneous.

    The music had to feel like it was falling and catching itself at the same time. We wanted the audience to experience that moment of uncertainty, that split second where you’re not sure if everything will come together or fall apart. – John Meehan, 2014

    The Judging Controversy That Sparked Years of Debate

    Tilt finished second at the 2014 DCI World Championships. The Blue Devils took gold with a more traditional, symmetrical design.

    The margin was small, but the reaction was massive. Fans debated whether the judges rewarded safe design over innovation. Some argued Tilt was too radical, sacrificing technical cleanliness for conceptual boldness. Others insisted the show represented the future of drum corps and deserved the top score.

    The controversy exposed a fundamental tension in competitive marching arts. Should judges reward technical perfection or artistic risk? Can a show be both groundbreaking and clean enough to win?

    Here’s how different caption areas scored Tilt versus more traditional designs:

    Design Element Tilt Approach Traditional Approach Judge Response
    Drill formations Asymmetrical, unpredictable Symmetrical, balanced Mixed scores, some penalized for “lack of form”
    Prop usage Tilted, interactive, risky Flat, decorative, safe High visual scores, concerns about safety
    Musical phrasing Fragmented, dissonant Resolved, harmonic Praised for originality, questioned for accessibility
    Color palette Stark, monochromatic Vibrant, corps traditional Noted as bold but divisive among visual judges

    The debate continues today. Many designers cite Tilt as the moment drum corps split into two camps: those who valued innovation and those who prioritized execution. The truth is probably more nuanced, but the conversation itself changed how corps approached show design in subsequent years.

    The Ripple Effect on Drum Corps Design Philosophy

    Walk into any DCI show today and you’ll see Tilt’s influence. Asymmetrical drill is now standard. Props interact with performers in ways that would have seemed impossible before 2014. Corps take creative risks that would have been unthinkable a decade earlier.

    The Bluecoats themselves built on Tilt’s foundation. Their 2016 show “Down Side Up” won the championship with an inverted stage design. The 2017 production “Jagged Line” continued exploring asymmetry and angular movement. Each show pushed further into the territory Tilt first mapped.

    Other corps followed suit. The Blue Devils incorporated more risk into their designs. Carolina Crown experimented with unconventional staging. Even traditionally conservative corps began questioning whether symmetry was a requirement or just a habit.

    The shift wasn’t just visual. Musical arrangers felt emboldened to write more adventurous scores. Guard designers choreographed movement that prioritized expression over perfect unison. The entire activity became more willing to accept imperfection in service of artistic vision.

    Three Steps to Understanding Tilt’s Design Process

    If you’re trying to grasp how the creative team built such a radical show, here’s the process they followed:

    1. Start with a concept that creates tension. The team chose “tilt” as both a literal and metaphorical idea. Everything in the show had to create a sense of imbalance or uncertainty. They rejected any element that felt too comfortable or resolved too easily.

    2. Build the visual design first, then solve the technical problems. Most corps design shows around what’s physically possible. Tilt reversed that order. The creative team imagined the tilted prop, then figured out how to make it work. This approach led to innovations in prop construction and safety protocols that other corps now use.

    3. Test everything with real performers early and often. The design team brought members into the process months before the season started. They built prototype props at different angles, tested marching techniques on tilted surfaces, and adjusted the design based on what actually worked. This iterative process prevented the concept from becoming impossible to execute.

    Common Misconceptions About What Tilt Actually Did

    A decade later, myths about the show persist. Let’s clear up the most common ones.

    Myth: Tilt was the first show to use props. Props had been part of drum corps for years before 2014. What made Tilt different was how the prop functioned. It wasn’t decoration or a platform. It was an active element that changed the performers’ relationship to space and gravity.

    Myth: The show was intentionally designed to lose. Some fans believe the Bluecoats knew Tilt was too radical to win and designed it anyway as a statement. The reality is more complex. The corps absolutely designed the show to compete for a championship. They believed innovation and execution could coexist. The second place finish was disappointing, not intentional.

    Myth: Tilt abandoned all traditional drum corps values. The show still featured world class brass playing, precise percussion work, and athletic guard choreography. The difference was the context. Tilt proved you could maintain technical excellence while completely rethinking the visual framework.

    Myth: You had to see it live to appreciate it. While the live experience was undeniably powerful, the show translates remarkably well to video. The camera angles actually help viewers appreciate the extreme angles and spatial relationships that were harder to see from the stands.

    Why 2014 Was the Perfect Moment for This Show

    Timing matters. Tilt couldn’t have happened five years earlier. The activity wasn’t ready.

    By 2014, several factors aligned. High definition video made it easier for fans worldwide to watch and discuss shows. Social media gave designers direct feedback from audiences. The judging system had evolved to reward creativity alongside execution.

    Technology played a role too. Prop construction techniques had advanced enough to build structures that were both safe and visually dramatic. Audio equipment allowed for more nuanced musical production. LED lighting created visual effects that enhanced the tilted staging.

    But the biggest factor was cultural. A generation of designers who grew up watching innovative corps like the Cavaliers and Phantom Regiment were now creating shows themselves. They understood tradition but weren’t bound by it. They had the confidence to ask “why not?” instead of accepting “that’s how it’s always been.”

    The Bluecoats organization provided the perfect environment. The corps had a history of creative risk taking. The administration supported the design team’s vision even when it seemed impossible. The members trusted the process and committed fully to the concept.

    The Legacy That Keeps Growing

    Ten years later, Tilt remains a reference point. Designers mention it in planning meetings. Judges cite it when discussing innovation versus execution. Fans use it as shorthand for the moment drum corps modernized.

    The show proved that audiences would embrace radical change. Ticket sales and video views demonstrated that innovation attracted attention and grew the fan base. Corps realized they didn’t have to choose between artistic vision and commercial success.

    Educational programs felt the impact too. High school and college marching bands started experimenting with asymmetry and unconventional staging. The ideas that seemed too risky for competitive drum corps in 2013 became standard teaching tools by 2020.

    What Performers Learned From Living Inside the Show

    Talking to members who marched Tilt reveals insights that video can’t capture. They describe a unique bond formed through shared risk. Every performance felt like a tightrope walk. One person’s mistake could cascade through the entire production.

    That pressure created focus. Members report that Tilt taught them concentration skills they use in careers far removed from drum corps. The physical demands built resilience. The creative freedom showed them that rules exist to be questioned.

    Many describe the show as a turning point in their artistic development. They learned that perfection isn’t the only goal. Sometimes the most memorable performances include small imperfections that make the moment feel human and real.

    How Tilt Changed What Audiences Expect

    Before 2014, drum corps audiences knew what to expect. Shows followed predictable arcs. Visual moments happened at expected times. The experience was satisfying but rarely surprising.

    Tilt recalibrated expectations. Audiences learned to anticipate the unexpected. They became more willing to sit with discomfort and uncertainty. The show trained fans to appreciate artistic risk even when execution wasn’t flawless.

    This shift benefited the entire activity. Corps could experiment without fear that audiences would reject anything unfamiliar. The relationship between performers and viewers became more collaborative. Fans started seeing themselves as participants in an evolving art form rather than consumers of a static product.

    A Show That Still Feels Relevant

    Most drum corps shows have a shelf life. They’re impressive in their moment but feel dated a few years later. Tilt is different.

    Watch the show today and it still feels modern. The design choices that seemed radical in 2014 now feel prescient. The show anticipated where the activity was heading and helped steer it in that direction.

    That relevance comes from focusing on fundamental questions rather than trendy answers. Tilt asked what happens when you challenge basic assumptions about space, balance, and symmetry. Those questions don’t expire. New generations of designers continue wrestling with them, finding their own answers.

    The Bluecoats gave the activity permission to be bold. They showed that second place with a revolutionary show beats first place with a forgettable one. They proved that the risks worth taking are the ones that change what’s possible for everyone who comes after.